WELCOME

WELCOME!

So . . ., you've finally found the perfect place, lots of storage, nice size rooms, all the extra amenities. But, then you're told "no painting and no making holes in the walls"! You feel all your decorating plans going out the window. What can you do to make the space your own.

Well don't despair. There are many ways to get around the restrictions and limitations and I am here to share the ways I've overcome them over the past 18yrs.

I hope you enjoy my tips and will also share your own. I'll also be sharing some of my on going projects. Once again . . .
WELCOME!!!

Barbe aka Bee

March 28, 2012

Bathroom Cabinet Update!

Happy Tuesday everyone!  Well, the weather's been wet and my energy level has been low.   So I didn't get around to starting the Frugal Treasures party this week.  But I did want to give mention to the link which got the most links.  Last weeks most clicked link goes to:

Caps Creations for her great thrifty finds!  She really scored on these jars, as well as, some cast iron skeleton keys!


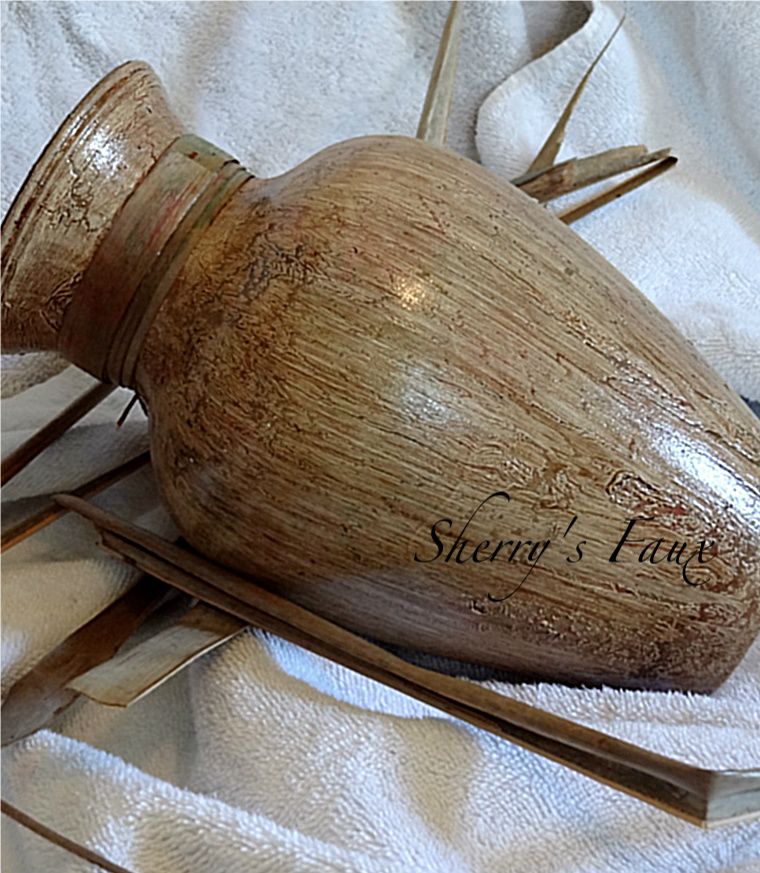
I would have to say my favorite was when Sherry @ Decorating With Cents took an ordinary glass vase and created art!  Awesome job!


So that's it for this week.  Sorry for not having the party link but my health tends to ride with the weather.  And right now, it's damp and blue just like me. : )  I hope you'll come back next Tuesday for the party!
But, on the days we had some sun, I did manage to finally makeover my Tri-mirror medicine cabinet for my bathroom.   If you missed that post you can find it here.   It's not anything special, particle board covered in a wood look laminate.

But it provided much needed storage, so I figured I'd give it a facelift!  So I taped off the mirrors and got it ready for priming.

After the primer dried I painted the cabinet box a sage green.  I then painted the mirror frame one coat of black and went back over it with Valspar oops can from Lowe's in a dark raspberry color.

I think it came out pretty nice.  What do you think?   It became too cloudy to take pics of it on the wall so will save it for the reveal of the completed room, which by the way is almost completed.  Have you noticed from my post that I'm doing 2 rooms at the same time? lol  The bathroom should be done by the weekend.  But I've come to a stand still with my bedroom until I get a working sewing machine and the correct size bed rails.  I should have the desk turned nightstand finished by this weekend also.  Here is where I am so far.
Well, thank you so much for visiting again.  We have sunny days coming this week, so maybe I can get some things done; if I get my energy level back up.  Hope your week is going well! : )
~Barbe~

I'm linked to these parties:
Furniture Friday @ Decorating Insanity
Feathered Nest Friday @ French Country Cottage
Thrifty Love Friday @ Cap Creations
Center of Attention Sunday @ Center of Attention Deficit Disorder
Sleepy Sunday Party @ Randee's Organized Chaos
Nifty Thrifty Sunday @ Nifty Thrifty Things

March 22, 2012

Creating an Apt DIY Workspace!

Good Morning!
Well we've had some sunny days, but I had a bad sinus infection. Finally got over infection and now its raining again. *_* I was a little bummed when my new mattresses didn't fit my bed I had just made over!  : (   You can read about it here.   So I thought I'd address one of the challenges you may have doing diy when renting!  This might not be a problem if you are in a house or duplex with outside space or maybe not even if you are in an apt with a garage.   But if you are like me, you don't have either.  So then you may have to be a bit more creative in coming up with a work area to use your power tools or spray painting/priming. :  )

The most important thing is preparation.   Here is a diy space I created to be able to spray prime and paint some projects!  I put plastic up over the fence to prevent any over spray from getting on the neighbors cars.  Very important for good relationships with your neighbors and shows management you are considerate and discerning!
As you can see below, I also put down cardboard on the ground so there wouldn't be any sign that I had even been out there when I finished.  The manager even mentioned that point and complimented me on it.

When I finished I made sure I put it all away and that there was nothing left to show I had even been out there.  When I was only rolling and brushing paint and primer I created a space in my parking space, as seen below. I used two folding chairs and covered them with plastic and an old sheet!  I placed the furniture pieces over the chairs so I didn't have to keep bending over to pain the leg bottoms.  
 
I also place the pieces up against the fence to dry and made sure I kept the walk way unblocked.  The manager commented on how he appreciated me doing that so he didn't have to deal with complaints from other tenants.
When it rains I had to come up with another solution.  I live in a one bedroom so I don't even have an extra bedroom space to work in when the weather is bad.  So when I decided to replace my mattresses as part of my bedroom makeover, I used an air mattress and slept in the livingroom.  Thus I was able to take advantage of the space to set up a painting area in the bedroom when it rained.  I got quite a bit done including finishing this small piece.
This little table is sitting on top of the coffee table which is covered with plastic and the old sheet.  Kept my carpet safe and I was able to sit and paint the details and reach the legs with ease.  I left the window cracked open for ventilation and close the door to the room at night.  Later I waxed the pieces in the same space before my mattresses arrived.  FYI, I found out the hard way not to use the Johnson Wax inside.  Even with ventilation that stuff just smells too strong for too long. *peeeeew*   I won't be able to use the room again now that the bad is back in there, but with warmer weather coming it won't be a problem. -_^ 

Well we have showers for the next couple of days, but as soon as the sunny days return I'm going to tackle this cabinet.  I just removed the louver slats today and will either add glass or chicken wire!  Which do you think would be better.  The color will be a buttery cream color with black hardware.  I'll add more pics in another post.
What have you done to get around limited space for your diy projects.  Hope you have a great day. :  )  Thanks for stopping by again.
~Barbe~

March 19, 2012

Frugal Treasures Tuesday #4

Well, I finally finished my bedframe, you can find the before shots here Bedroom Makeover Updates. I was very happy with the results and just one day before the delivery of my new mattresses!  I started by removing a plaque from the center, you can see the mark below.  I then primed and stenciled a rose swag using spackling paste.  Then I painted with a gloss royal blue paint I bought years ago from BigLots

 and went over it with homemade chalk paint recipe from No Minimalist Here  using my wall paint (if you missed that post just click the Bedroom Makeover link at the beginning of this post) and then did a little distressing and waxed.   I used Johnson Wax to finish it; smelled so bad, pew!!!  Can't use that one again unless I can leave it outside all day.  Here is the before:

The before with plaque removed.


This is after primer and first coat of paint.

Working on the footboard.

And this if the after.  I love how she looks.
But imagine my disappointment when the new mattresses were delivered yesterday and they didn't fit!  Aaarrgh!!!  The frame is wide enough but the rails are too short. : (
 Ignore the curtains, they're still up from the old look.

A close-up of the rose swag I stenciled on it!

  Apparently, this queen set is a little larger than the usual size.  So for now, my new set is on the floor until I find some rails that will fit.  Will definitely be checking the thrift stores this week.
You can see the rails sitting behind the headboard; only 3 inches too short. *_*  So this is where I'll be sleeping tonight, but it will give me time to sew my bedding and window treatments. : )  Now on to the featured links for the party!
~Frugal Treasures Tuesday~

The link with the most clicks goes to Vicky at Decor & Harmony !  She shows how you can use what you got to get what you want!  Look at her knock off creations using chalk paint!  Great job, Vicki!


Sherry at Decorating With Cents brightened up her kitchen with these cute lamps!


What a fun way to set a spring table.  Maria Elena @ Our Home Away From Home created such a cute, fresh, and yummy look.


Sarah at Alderberry Hill was so imaginative in making this cute little shamrock tree!


Now on to this week's party!  A few simple rules:

  1. I would appreciate it if you'd become my follower so we can keep in touch and share.
  2. Please add either my party button or text link somewhere on your post so others can find the party and you can check back to see if you'd been featured.  
  3. Link up anything you've made, a great find, forgotten treasures or makeovers, recipes, or photographs. (No direct links to etsy shops, please)
  4. Try and visit at least two other links and leave a comment, you may gain a new follower. : )
Add your link below.  I'm linked to these parties:
Make the Scene Monday @ Alderberry Hill
Nifty Thrifty Tuesday @ Coastal Charm
Tuesdays Treasures @ My Uncommon Slice of Suburbia
Masterpiece Monday @ Boogieboard Cottage
Thrifty Love @ Cap Creations
Whatever Goes Wednesday @ Someday Crafts
Wow Us Wednesdays @ A Couple of Craft Addicts
Show and Tell Friday @ My Romantic Home
Vintage Inspiration @ Common Ground

March 16, 2012

Mantels and Cloches- My Touch of Spring

Well, have you heard the latest buzz in blogland?  It's all the link parties for spring mantels and spring cloche.  Well I don't have a fireplace nor a mantel, but I just hate to be left out! LOL!!!  So here is a quick take I had on each!  Sorry but I don't do professional style picture settings; in the middle of too many room makeovers with limited space.  But I enjoyed doing them and hope you will too!
This shelf was previously in cobalt blue and white with wine accents!  The white coffee pot is part of a vintage set my mom used to have.  It's the only piece that survived when our home burned.  The large charger was a gift from a friend as it went so well with the kitchen I had at the time.  The print only cost me a dollar at a flea mart.


I wasn't sure what I would do, just started grabbing pieces!  I bought the flowers because I loved the spring color of new green; had no idea where I'd use them.


Some of these pieces I forgot I even had.  I do love how my nesting hen looks!  


My take on a cloche!  I couldn't find anything to use.


Then I found the tall glass vase and just went for it.  I love how the rose carved piece from Avon matches my new bedroom color.  I thought I'd have to store these pieces.  I found it as well as the decanter and cup and saucer at different thrift stores.


Imagine my surprise, after I finished these pictures and I found my crystal domed cake plate as well as a small glass container that would have been perfect.  But the moment had passed and I had to get back to painting my bedroom furniture.  Oh well, maybe I'll add a more complete and thought out one when I finish the bedroom. Thanks for stopping by and sharing my touch of spring!   Have a great weekend!
~Bee~

I'm linked to these parties:
Open House Party @ No Minimalist Here
Feathered Nest Friday @ French Country Cottage
Saturday Night Special @ Funky Junk Interiors
White Wednesday @ Faded Charm
Creative Bloggers Party @ Homemaker on a Dime

March 13, 2012

Frugal Treasures Party #3

It's Par-Tay Time!!!  I want to thank everyone who made it to the party last week and thank you all for your patience with the delays.  You've all really been busy with some great projects.  I found many new followers through the party links and many great blogs.
Here is what I completed so far this week.  You may remember my Painting Dilemma post about the little table which had the bubble effect on the top after priming.  Well, after many helpful suggestions and tips from you readers, I decided to just try sanding the top some more.  Happily, I was able to get rid of the bubbles, but still wasn't as smooth as I had wished.  But I decided to leave it as is and just go for the paint.

This was also my first try with the homemade chalk paint recipe I got from  No Minimalist Here.  I so love Chalk Paint!  It did take me a bit of mixing until I thought the texture was right.  I wasn't sure if the measurements were for dry or mixed plaster of paris.  But I went for after it was mixed and it came out okay!

  The second batch I mixed for my bed frame came out even better, but that's for another post! -_*  The paint color is Behr Petal Bloom with a few squirts of Plaid FolkArt Enamels acrylic paint in Berry Wine.  The acrylic paint gave a little more depth to the pink which matched my fabric choice better.  I then did a wash with a glaze of antique white and then added some trim colors to go with the chair it will sit next to.

March 11, 2012

Bedroom Makeover Updates

Hello and happy Sunday!  I hope you all had a great weekend!  My weekend was pretty productive and I finally got started on my bedroom makeover.  First I painted the main wall a beautiful robins egg bluish color (Valspar - Lake Country).

After that I painted my bedframe, this is only the first phase of it.  Here is the before pic:


Here is the after pic of my bed and below it the inspiration I found for it.
This pic shows the wall color more true!
I found this inspirational french armoire on Pinterest from Paint Me White
I love the dark undertone in this paint technique! 

March 8, 2012

Linky Party Update & Painting Dilemma!

Hello Ladies, thought I'd do a quick post to let you know the Frugal Treasures Link Party is back up and running!  Hope you'll come back and share links to your projects.

I also was looking for help with a dilemma on my little table.  Anyone know why it bubbled like this after I primed it and what I can do to fix it?  You can see what it looked what it looked like before here.   There was some water damage.  But I thought it would sand out; even then it didn't sand very smooth. The more I sanded it the more it seems to peel and almost shred on the edges.  Any ideas . . . ?  I thought of adding mosaic tile to the top, but wonder about the stability of it as a base. What do you all think?  I really need the help and suggestions.  Thank you in advance.


Barbe

March 7, 2012

Easy Tart Lemon Bars

Hello, this week has just not worked in my favor; health took a nose dive.  So since getting my projects completed is not happening, I thought I'd share something light, bright, and tasty! ^-^
I first got this recipe from a friend in Oregon and then found it also on Allrecipes.com.  I made my own adjustments and came up with this recipe that is both quicker than my friends and more lemony than what I found online.   Here is a pic of what they look like:

Isn't the color beautiful, that's from the extra lemon juice and lemon zest I added.  The crust is like a butter cookie, with just a slight sweetness and light and buttery.  It is important to refridgerate a couple of hours to let the filling set and the taste jell properly.


~LEMON BARS~


CRUST
 2 cups flour
1 cup Butter (2 sticks)
1/2 cup granulated sugar
1/4 tsp salt

Preheat oven to 350
In medium bowl,blend together softened butter, flour, and sugar. Press into ungreased 11 x 7 pan.  Bake at 350 until light golden brown, about 20-25 minutes.  Set aside.

FILLING
4 eggs
2/3 cup lemon juice (fresh squeezed) about 3-4 lemons
1-1/2 cups of sugar
1/4 cup flour *plus 1 Tbsp
1 1/2 Tbsp of lemon zest
In a bowl, whisk together sugar and flour. Whisk in the eggs and lemon juice and zest. Pour over slightly warm baked crust.  Bake at 350 for 20-25 minutes or golden brown.
Sprinkle with powdered sugar while still warm and cut into squares.  Let sit and refridgerate a few hours before serving.


 We've got 70's temps for rest of the week so really looking forward to a good weekend!  Sounds like a good weekend of yard sales finds!  Happy thrifting to you!
Barbe

I'm linked at these Parties:
Treasure Hunt Thursdays @ From My Front Porch to Yours
Wow Us Wednesdays @ Savvy Southern Style
Open House Party @ No Minimalist Here
Inspiration Friday @ At The Picket Fence
Feathered Nest Friday @ French Country Cottage
Overflowing With Creativity @ It's Overflowing


March 6, 2012

Frugal Treasure Tuesday #2 Is Here!

Update:  Yippee!!!  Frugal Treasures is up and running!  Whew!  That took longer than I thought.  Thanks for your patience and support!
Barbe 3/7/2012

 Do you ever just have one of those days  . . . 

sure you have; we all do.   Well, this is definitely one of mine!  I ask for your patience as I explain.  Yes, . . . you read it right, the party will be delayed. *_*   There were some glitches on my blog with comments and links.  Then I didn't realize my subscription was expiring for Linky Tool! *blush*   Sheeeesh*  But the good news is all will be fixed by tomorrow so be sure to come back on Wednesday and we'll be able to party to our hearts content!
Unfortunately, things continued to go wrong . . .  I thought I'd be sharing the completion of this little table I showed as my next project at the end of the 'Rainy Day' post.  But after sanding and priming the top dried and left me with this you see in the bottom photo:
 You'll notice a slight raised areas and bubbling.  This was the beginning of the problems.


March 1, 2012

What To Do When It Rains

Good Morning All!
Well, we've had a couple of days of much needed rain here in Central California so that put a pause to my painting projects.  Since my apt doesn't have a garage, I had to otherwise occupy myself.  So . . . I thought I'd share with you some of my other crafty endeavors I've worked on of late.  I bet you didn't know I also played with and was as addicted to textiles as much as I am paint! lol  I have so much yarn and fabric that I need another armoire just to store them. -_^   I recently started crocheting more often after I discovered the tutorial videos on YouTube!  Bazinga!  I was off and running again.  I've learned so many new stitches and have even started developing my own patterns!    I made these hats and hair scrunchies for my granddaughters who live in 2 different states.


It's Overflowing Sunday

It's Overflowing Sunday
Great diy!

Sew Crafty Tuesday

The Sewing Loft

TheSewingLoftBlog.com

One Good Thing

Lu Lu's Fluffy Ruffles

Photobucket